

This summer I found a wind-up wall clock at our local thrift store, and bought it with the thought of disassembling it for gears and other cool clockwork steampunk parts. However, when I discovered that it was in perfect working order, with a nice Westminster chime, no less, I couldn’t destroy it. On the other hand, it was an exceptionally ugly clock of prime 1973 vintage. I regret that I stupidly failed to take a “before” picture of it, and a search on the web reveals no one else proudly showing off their similar clock. So I have to assure you that the face was trying too hard to look fancy, while the case, made of cheap wood with a cheap finish, wasn’t trying nearly hard enough. Plus, the top finial was broken off. So clearly the clock couldn’t stay the way it was, and I decided that if I wouldn’t take the clock to the steampunk, I’d bring the steampunk to the clock.

P joined me to assist and encourage. First step was to remove the face, and then the entire clockwork block and the chimes from the case. Next we removed the pediment, with its broken finial, and took the saw to the bottom and cut off the lower box around the pendulum, so all that remained was a square box. I next removed the board that supported the clockwork and used a jigsaw to cut away the excess wood that would cover up some of the clockwork. After some sanding we reassembled the support for the clockwork, and painted the entire case black, as there was going to be no way to make its wood look good.
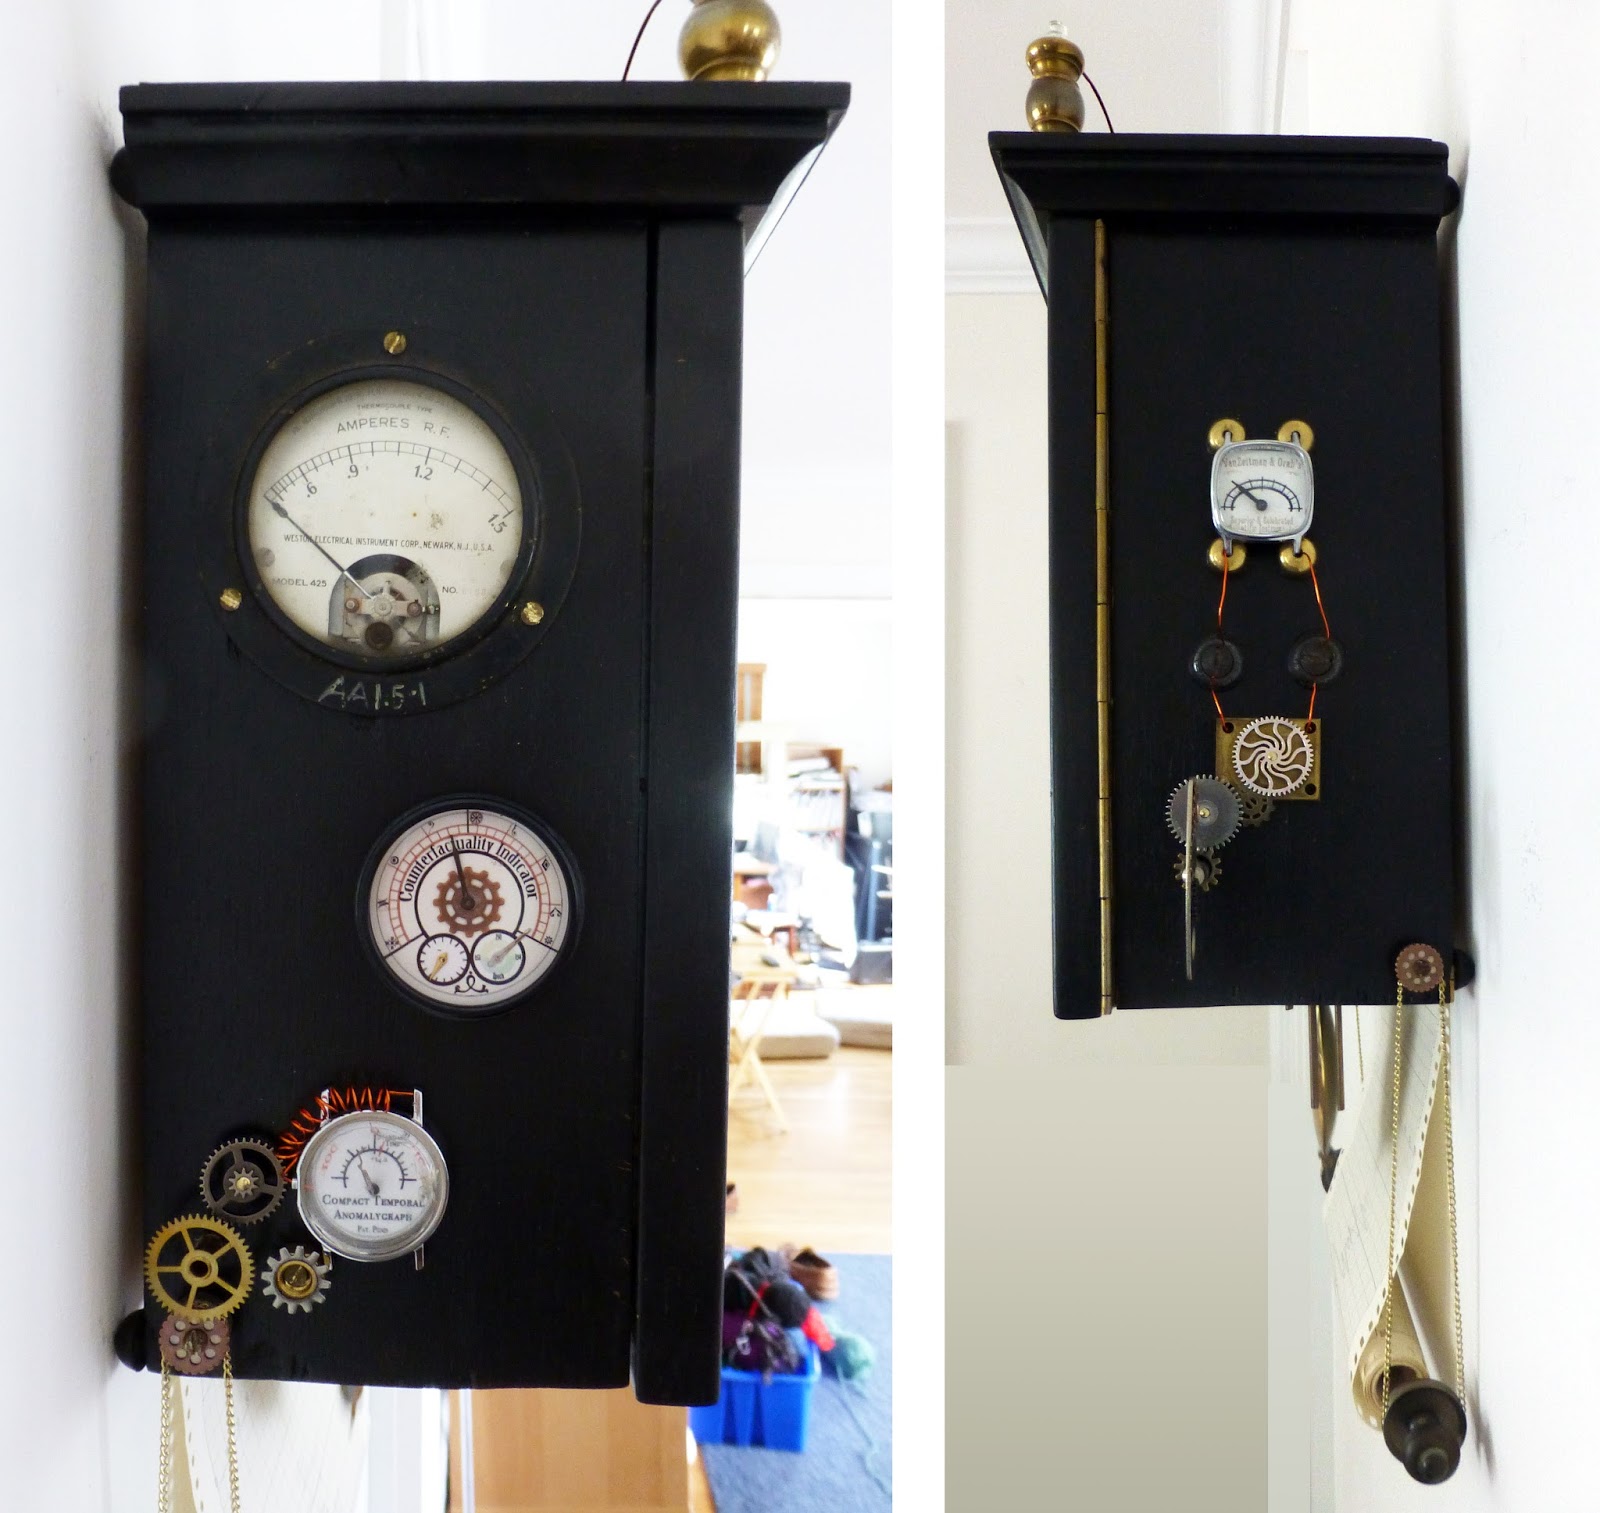
With the clockwork screwed back into place, it was time for embellishment. P and I went through our collection of steampunky parts and gathered some inspiration, including a roll of scientifically ruled paper which gave us the idea of augmenting our clock with a temporal anomalygraph. In case you don’t know, that’s like a seismograph, except that instead of measuring tremors in the ground, it measures tremors in time. So I outfitted the bottom of the clock with chains, gears, and a bar to support the roll of paper behind the pendulum. Of course the temporal anomalygraph needed a gauge, too, and we made that in an old watch case. We also cut a hole in the side of the clock case to insert one real amp gauge, plus two more home-made gauges. On the other side I also drilled a hole to keep the winding key.

Having removed the clock face to reveal the workings, we did have to try to disguise the one visible plastic gear (this is a 70s clock, after all), and we needed to add numbers. I looked on-line for little brass numbers to add to the face, but found nothing that was really right. So I bought some small plain brass circles, and painted the numbers 12, 3, 6, and 9. Then we sprinkled extra gears and stuff about, hoping to add just enough interest, but not go overboard. I’m not sure whether I achieved the perfect balance, but I’m happy with it!
The top was the final embellishment to be glued in place. I tried to echo the shape of a classic clock pediment with something a little steampunkier. The bulbs don’t light up - in fact, the two little ones are burned out, and the middle one isn’t a bulb at all but was assembled from other bits. That’s usual for my creations - all just for looks and no function. But that’s why it’s so much fun that the clock actually works, and every fifteen minutes I enjoy its chime. Plus, I can keep an eye on its gauges and get early warning of any temporal anomalies or counterfactuality events.
[Pictures: Embellished clock by AEGN, 2015;
removed bits;
left and right sides;
front view.]
1 comment:
I like this. Interesting the way to put it all together.
Post a Comment