Method 1. Ink the block with multiple colors of ink all at once.
 1A. The easiest way to do this is to roll one color of ink over the entire block as usual, and then use a dauber to pounce different colored ink on a few key areas. I made myself a couple of daubers by wrapping flannel around a bit of synthetic stuffing and putting a rubber band around the top to hold it together and give myself something to hold onto. I made a small one and a tiny one. You wouldn't want to do this over a large area, and nor can you keep the ink confined very precisely, but it can work well when you want to highlight tips of things or allow a gradation at the edge of your highlight color. On the chipmunk I rolled brown and dabbed black just along the stripe and eye, while on the fish I rolled green and then dabbed yellow along the stomach and blue all over the background water.
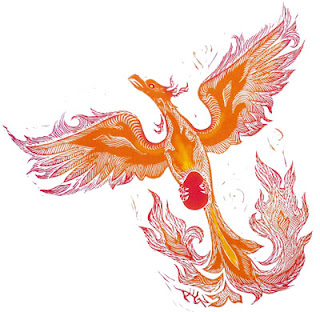
1B. The other way to get multiple colors onto one block is to roll different areas with different colors. The difficulty with this is that it's hard to roll with anything other than a straight, hard edge. In "The Sun & the North Wind" I used a small brayer to ink the cream color first. For the black and brown I made a gradation of ink on my rolling plate and then had the larger brayer inked in a gradation of color. My attempts to roll in a curve were only partially successful. For the phoenix I rolled orange over most of the block, then went back and rolled red over the edges of everything. (The red egg and the yellow on the stomach were then added with the daubers as described above.)
This is probably the most common method I use to add multiple colors to a block, although I think it's not nearly so common in the larger world of printmaking. Tune in next week for the "normal" way to make a multi-color block print.
[Pictures: Strange Fish II, rubber block print by AEGN, 1998 (sold out);
Chipmunk, rubber block print by AEGN, 2008 (sold out);
The Sun & the North Wind, rubber block print by AEGN, 1998 (sold out);
Phoenix, rubber block print by AEGN, 2010 (sold out).]


No comments:
Post a Comment